

Elementor’s drag-and-drop editor is powerful, but sometimes you need Custom CSS for Elementor to unlock full design control. This guide covers:
✅ When to use Custom CSS (and when to avoid it)
✅ How to add CSS in Elementor (3 easy methods)
✅ Pro tips for clean, efficient code
✅ Real-world examples (with snippets you can steal!)
Why Use Custom CSS ?
Elementor’s built-in styling options cover 90% of needs, but Custom CSS helps with:
- Unique animations & hover effects (beyond default settings).
- Overriding theme/plugin conflicts (e.g., stubborn padding/margins).
- Pixel-perfect responsiveness (fine-tuning for mobile).
- Brand-specific styling (custom fonts, complex layouts).
🚨 Avoid CSS when:
- Elementor’s native options can achieve the same result (keeps your site lightweight).
- You’re not comfortable debugging (broken CSS can crash your layout).
How to Add Custom CSS in elementor
Method 1: Elementor’s Built-In CSS Box
- Open any widget/section in Elementor.
- Navigate to the Advanced Tab → Custom CSS.
- Add your code (e.g.,
selector { color: #ff0000; }).
📌 Pro Tip: Useselectorto target the specific widget.
Method 2: WordPress Customizer
- Go to Appearance → Customize → Additional CSS.
- Add global CSS (affects entire site).
Method 3: Child Theme or Plugin
- For large-scale changes, use a child theme’s
style.css. - For beginners, try a CSS plugin like “Simple Custom CSS”.
Custom CSS for Elementor: Pro Tips
- Use Comments (e.g.,
/* Header Styling */) to organize code. - Mobile-First Approach: Wrap media queries like:

- Avoid
!important(unless absolutely necessary).
3 Ready-to-Use CSS Snippets
Custom Button Hover Effect

Fix Overflowing Sections

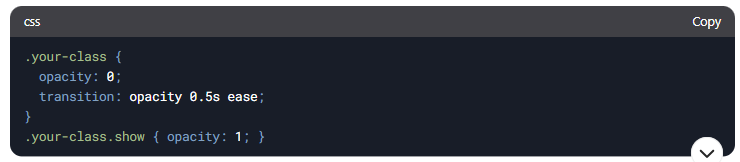
- Animate Fade-In on Scroll
Final Thoughts
Custom CSS bridges the gap between drag-and-drop and full design freedom. Use it sparingly, test thoroughly, and always back up your site!
🔧 Need help? Hire an Elementor CSS expert on Upwork or Fiverr.
Want More WordPress & SEO Tips?
🔔 Subscribe for actionable guides!